LASER cut boxes
Back in 2021, I was looking for a replacement for the commercial solution I had been using to store my LEGO parts collection. Around that time, I had the opportunity to learn laser cutting at a local makerspace, and I quickly realized the potential of using it to build boxes that could serve as the foundation of a custom storage system.
I started by exploring different techniques and designs before settling on a tight finger-joint system. This constituted the foundation of many creations that went well beyond the initial LEGO storage problem.
Let’s start from the beginning.
Bending wood
I wanted the boxes to be as thin as possible in order to maximize the available space for parts. I started by looking for suitable materials and found some 1 mm thick poplar plywood offcuts in a model-making shop. Perfect to get started.
Since I wanted to use as little glue as possible, I began thinking about different ways to build boxes by relying heavily on bending techniques in order to reduce the number of joints required.
To bend wood, my first idea was to cut a groove deep enough to leave only a thin layer of material, flexible enough to bend. While theoretically possible with laser cutting, it seemed difficult to execute reliably.
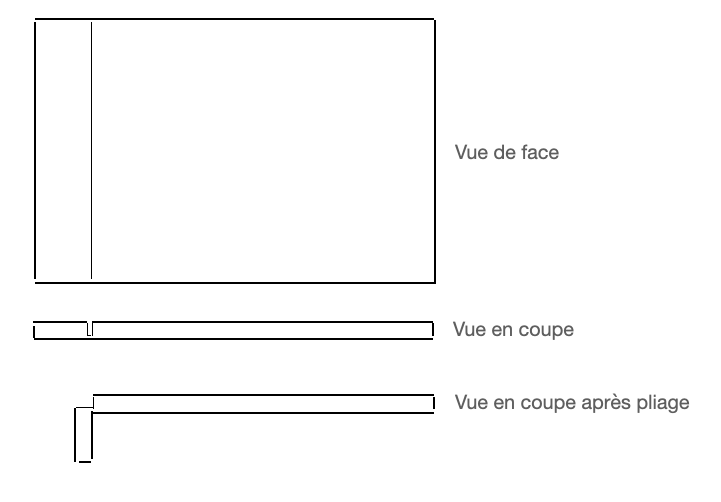
A more common technique consists of making alternating parallel cuts. This increases the overall flexibility of the part and allows it to curve.
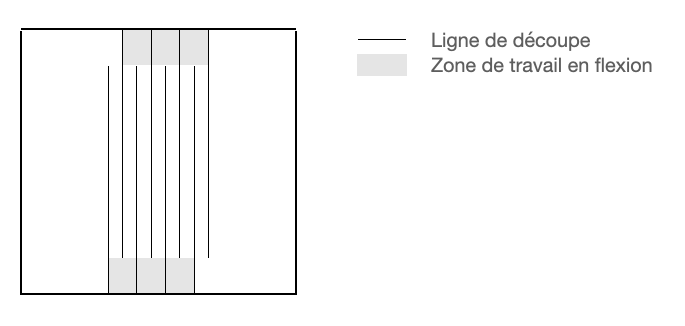
I experimented with the alternating cut technique by varying the spacing between the lines. The closer the lines are, the more flexible the piece becomes, to the point where it bends under its own weight.
The technique seemed promising, and I started imagining box designs making use of it.
Wrapped design
The first idea used a base with rounded corners around which a strip of wood would wrap, softened at the corners using the alternating cut technique.
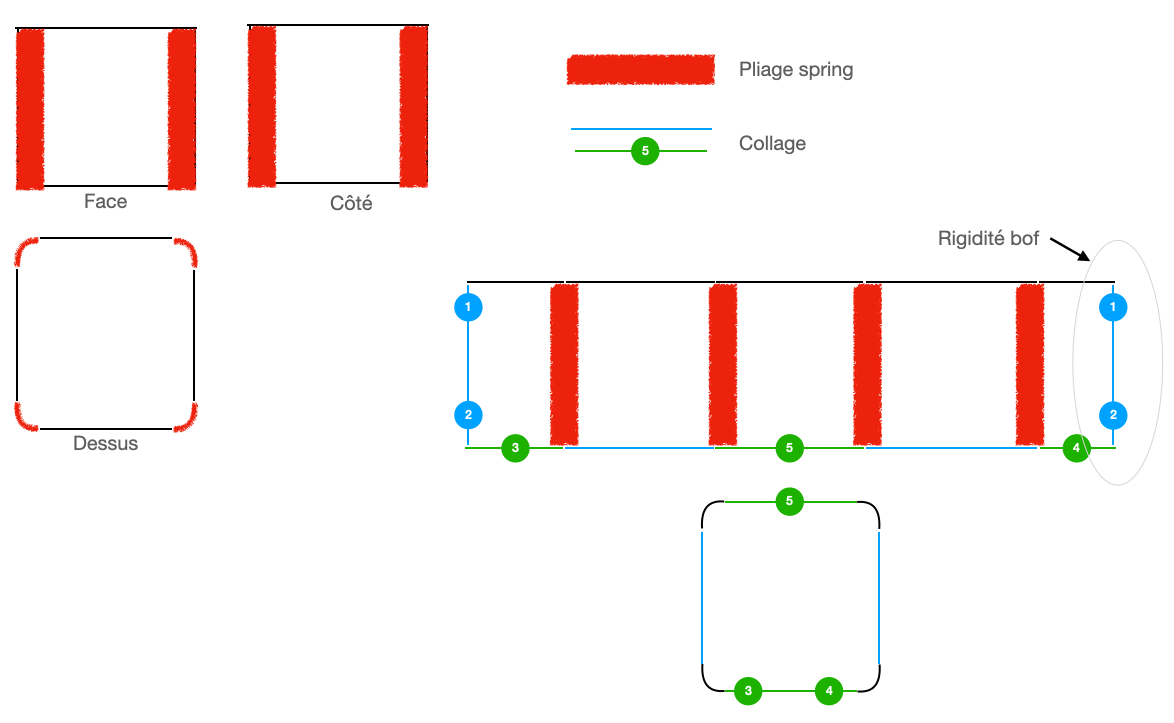
This design uses two parts and requires two joints. The first joins the base to the surrounding wall, while the second closes the perimeter strip itself. I planned to use glue for both.
The base joint is critical since it must support the weight of the box contents, and if it fails, the entire contents would spill out.
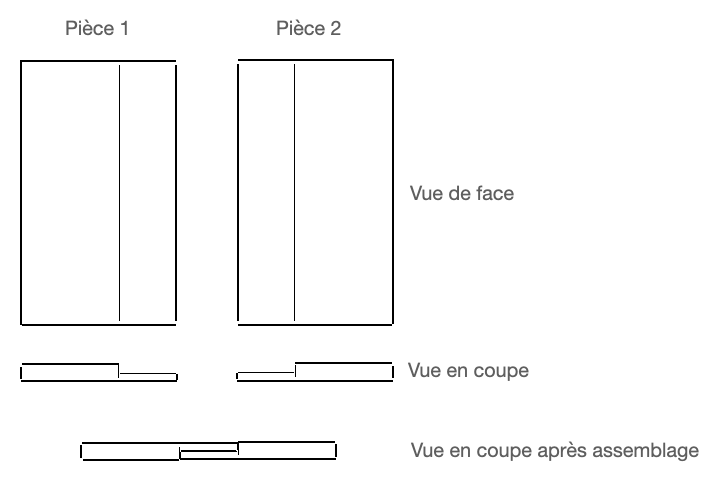
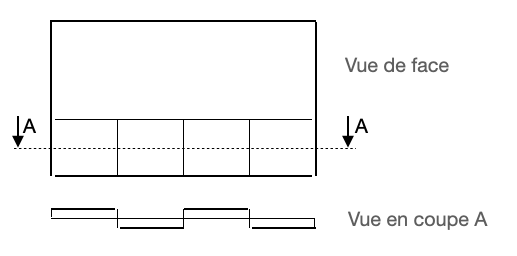
The perimeter joint, meanwhile, had to resist the natural tendency of the corners to flatten back out, and a simple edge-to-edge glue joint did not seem durable enough. To improve this, I imagined a solution where the ends of the two pieces are thinned down and glued overlapping each other. It is also possible to divide the overlap into several smaller alternating sections.
Basket design
The second bending-based idea was to create a kind of basket, with a U-shaped bent piece and two side panels.
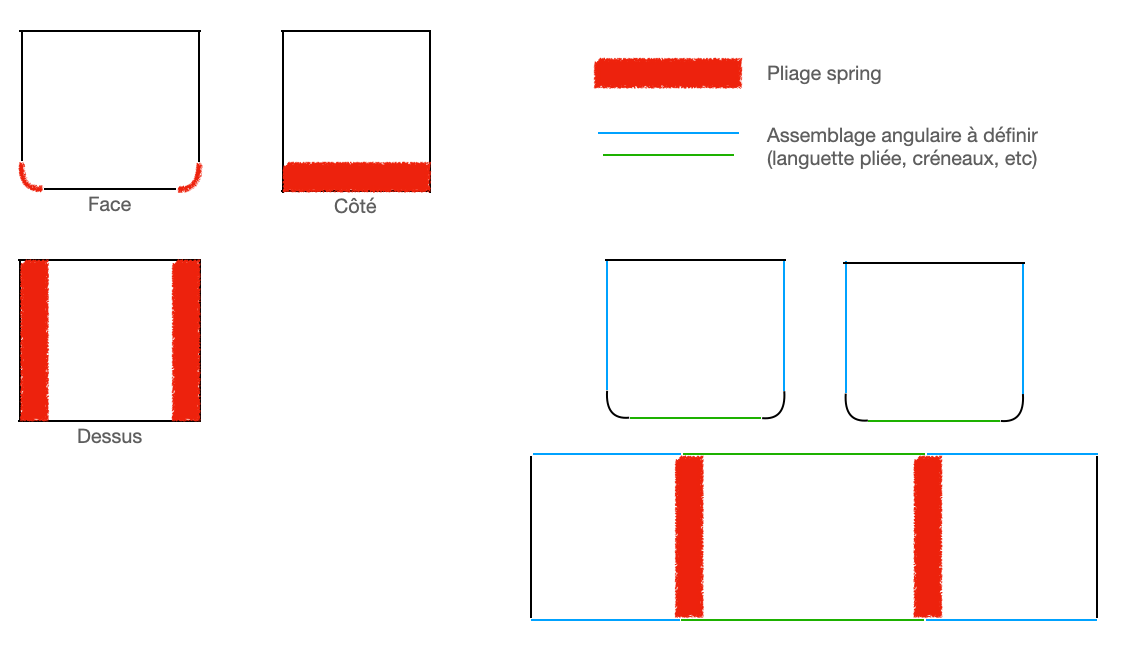
This design requires six corner joints. As an alternative to glue, I considered combining the groove bending technique with the overlap assembly method, which I refer to as a “folded tab” in the diagrams.
A variation of the basket design is the star-shaped version, where all four sides fold up from the base. This solution reduces the risk of failure at the junction between the base and the walls.
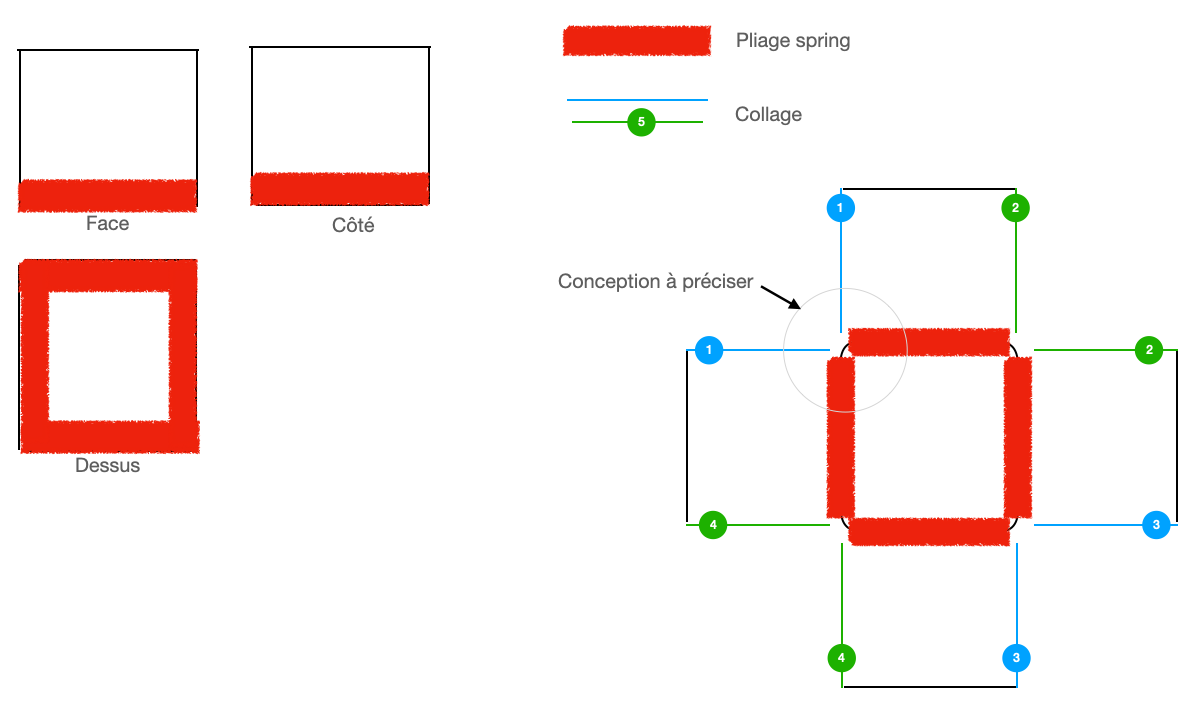
The star-shaped design introduces an interesting geometric problem regarding the shape of the lower corner pieces. To determine their shape, I modeled the assembly in Blender. I started by creating two quarter cylinders positioned at a 90° angle, then adjusted the end points so the surfaces would touch without intersecting. After that, I duplicated the pieces and “unfolded” them by rotating each edge in order to obtain a flat pattern.
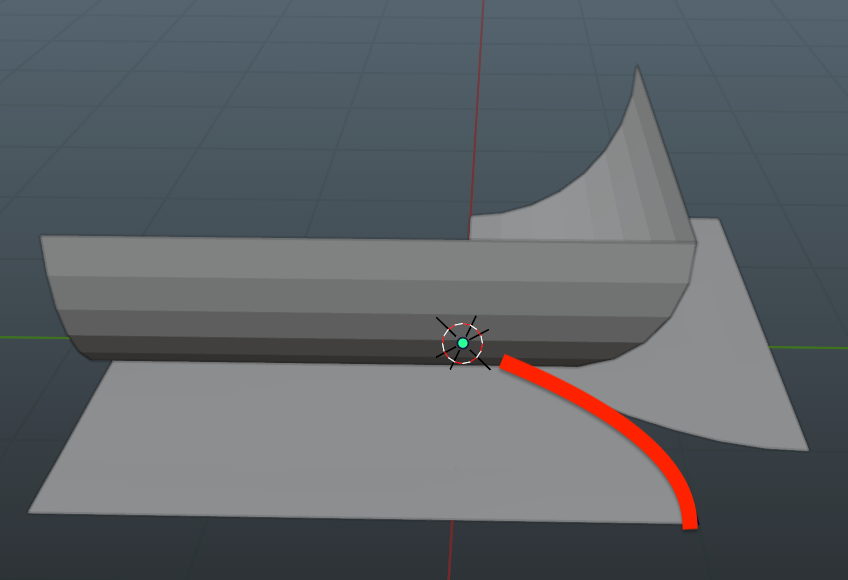
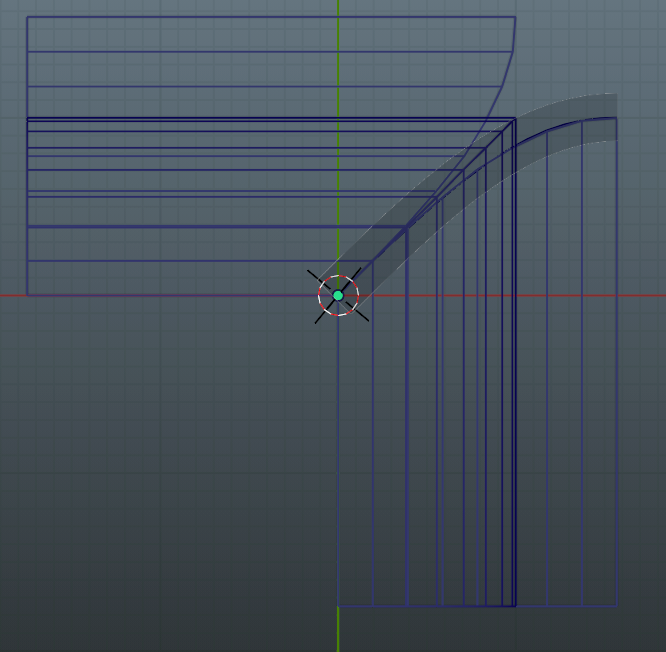
Finger-joint design
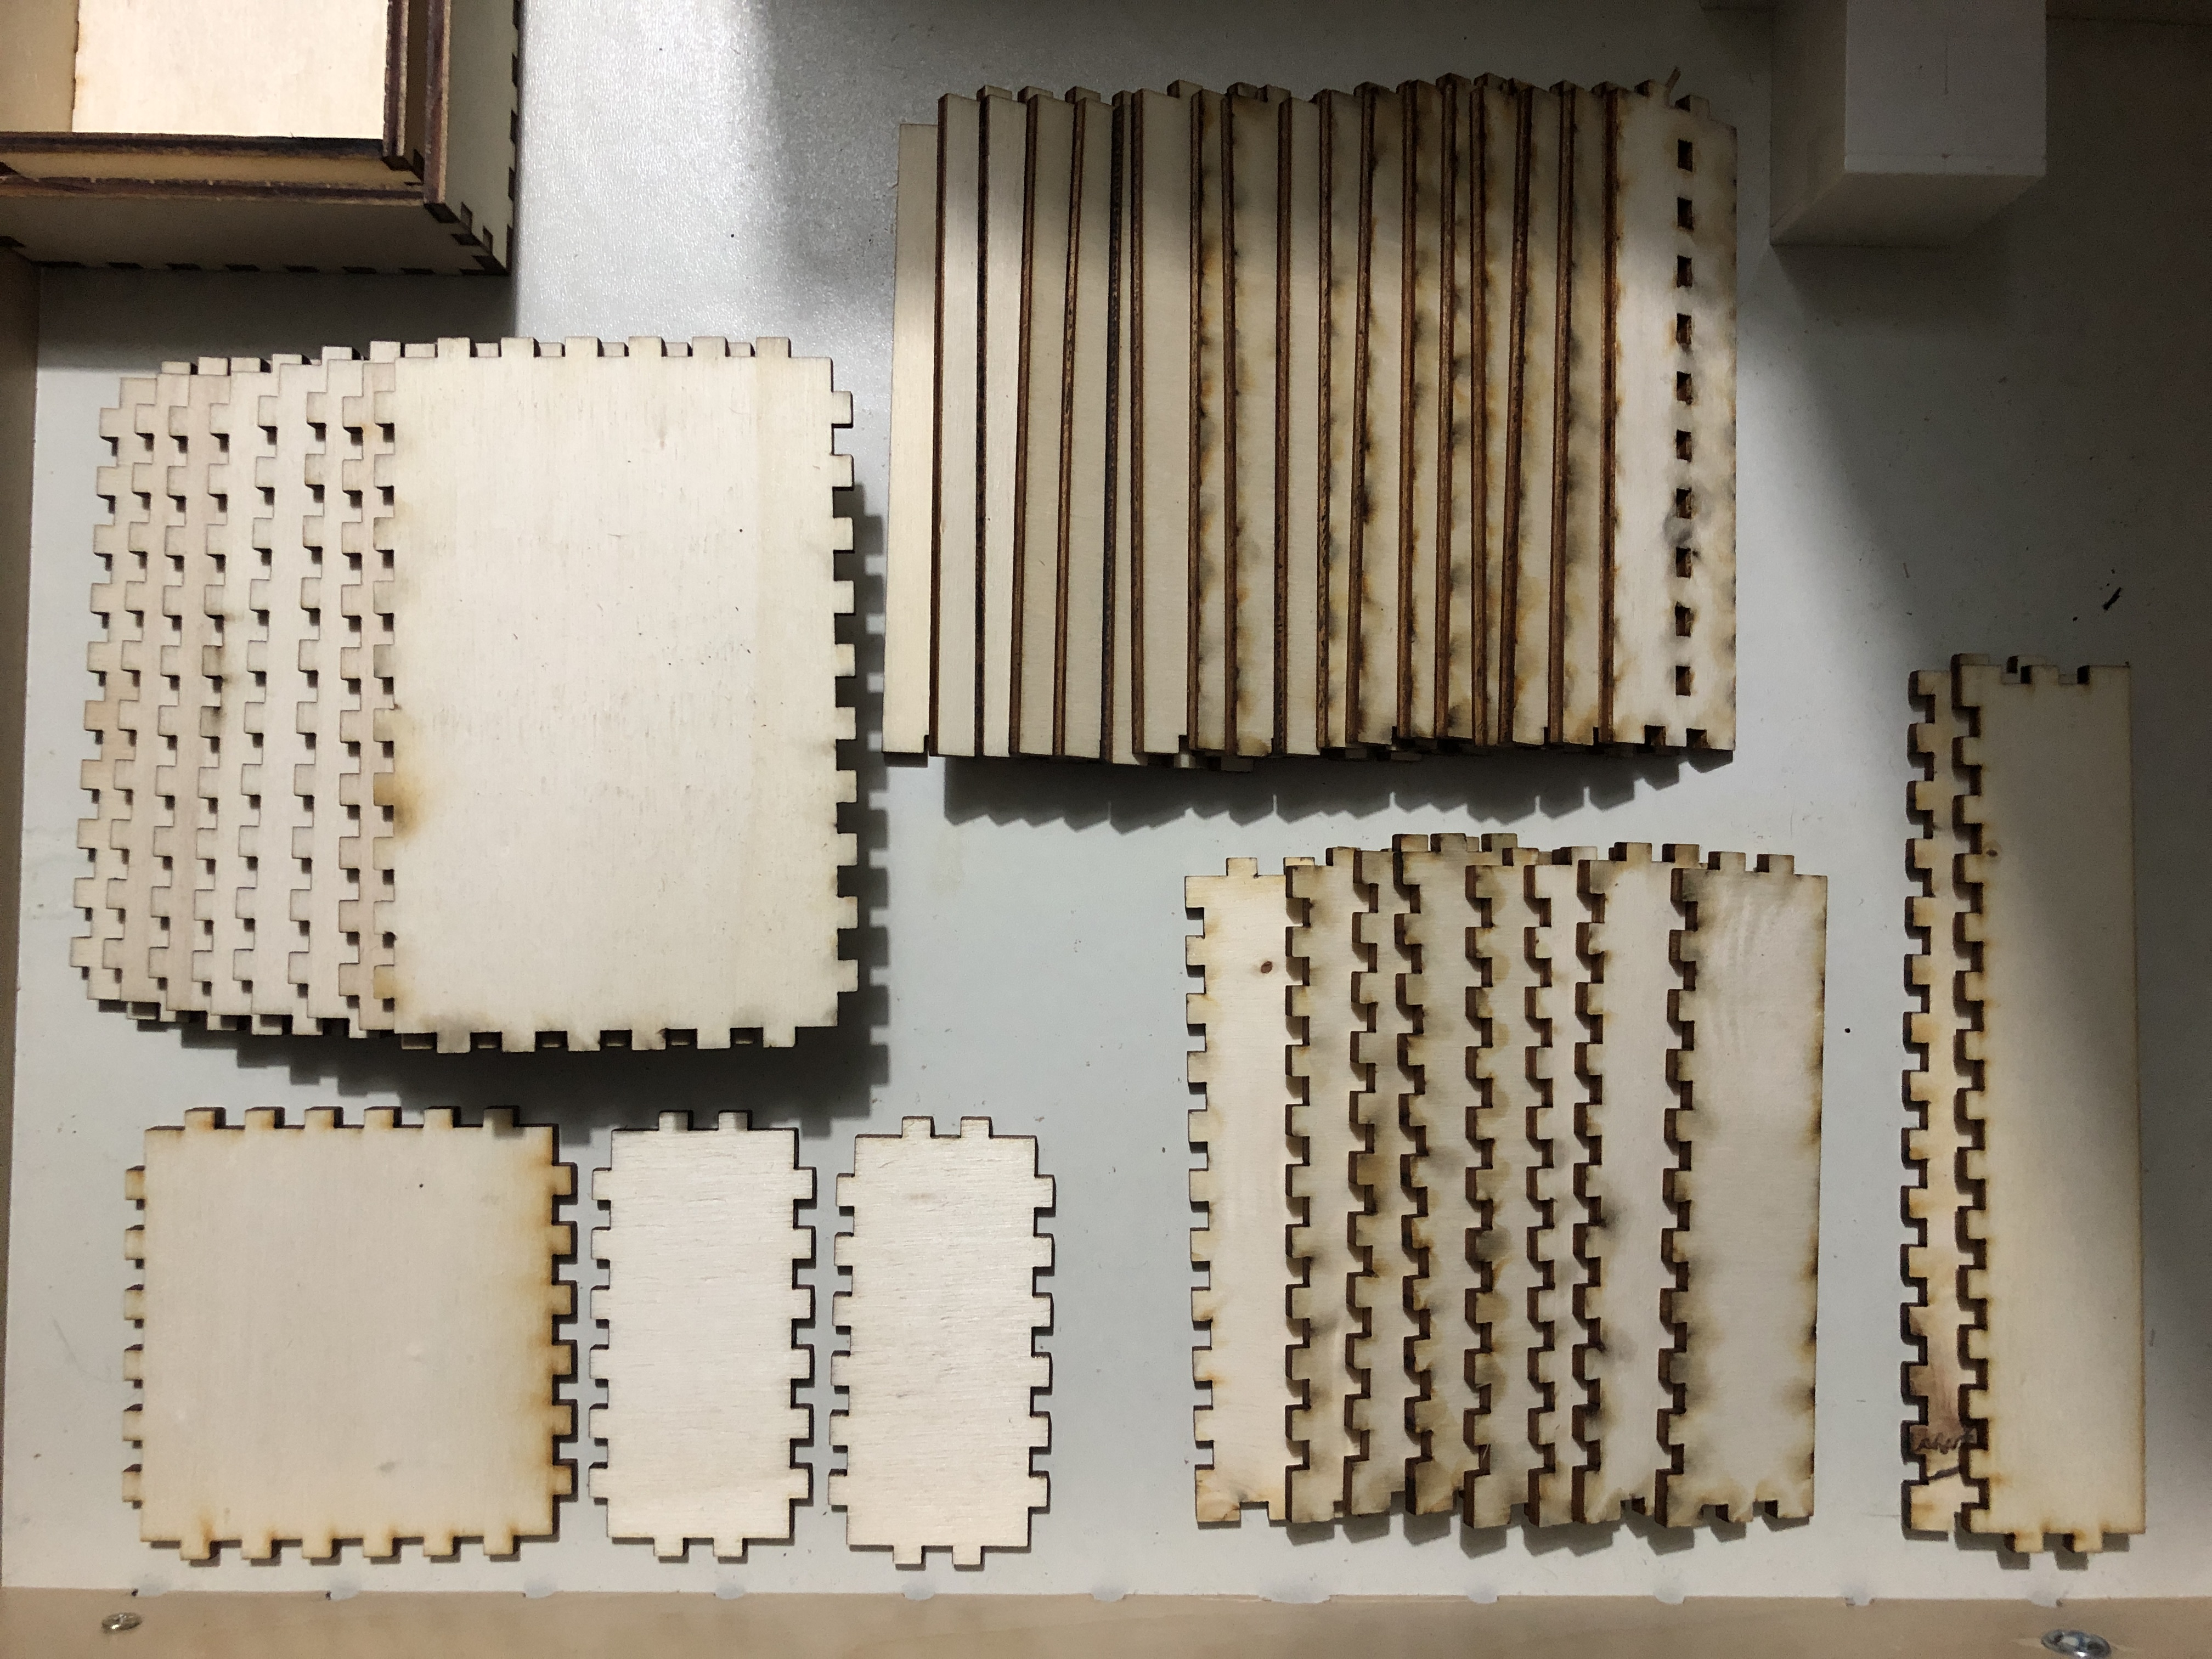
Eventually, I tested the classic finger-joint technique, where matching notches are cut into the two pieces to be assembled, then glued together.
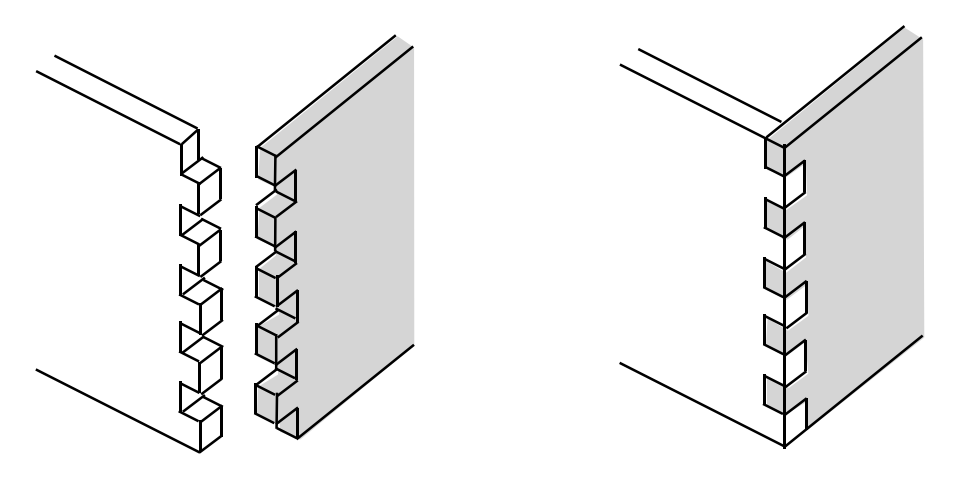
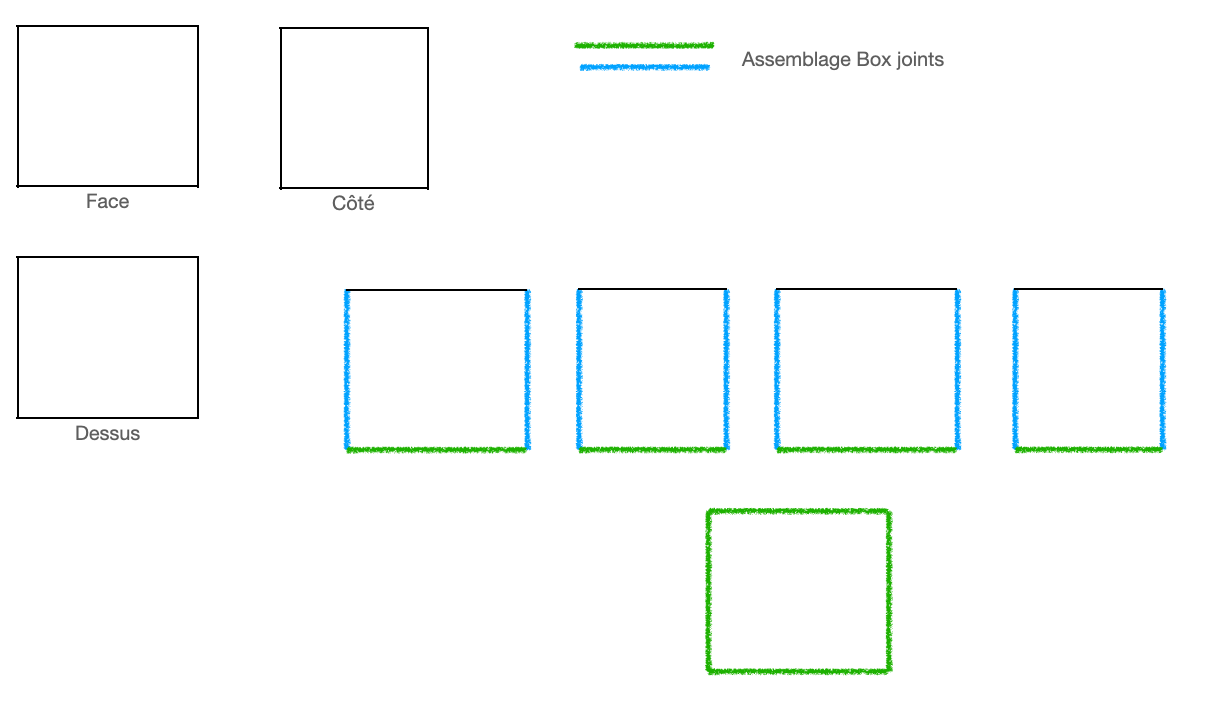
I made an initial test using this technique with the 1 mm plywood I had bought from the model-making store. I drew the five parts in Inkscape and exported them as DXF files for the machine. The cutting and assembly worked as expected, but in the end I realized that the thin wood made the box too fragile. I then switched to 3 mm plywood. By adjusting the relative widths of the finger joints, I was able to achieve a tight friction fit that holds together without glue.
In the end, this is the technique I used for all the boxes afterward.
I use generative AI to write and/or translate the content featured on this website. AI serves only as a tool for productivity and inspiration, I make sure that the final texts always reflect my personal voice and style.